-
×
 PSDA Universal 100W Multi USB Fast Charger - 24 Port Station
1 × 6,000 L
PSDA Universal 100W Multi USB Fast Charger - 24 Port Station
1 × 6,000 L -
×
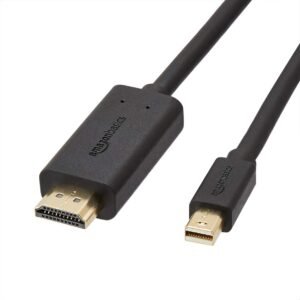 Mini DisplayPort to HDMI cable 4k
2 × 1,500 L
Mini DisplayPort to HDMI cable 4k
2 × 1,500 L -
×
 YC-CDA19Q 55W Fast Charging QC3.0 USB Type-C PD Charger Station LED Display
1 × 6,000 L
YC-CDA19Q 55W Fast Charging QC3.0 USB Type-C PD Charger Station LED Display
1 × 6,000 L -
×
 Spray BLUE BIRD BB-251 Cleaner
1 × 600 L
Spray BLUE BIRD BB-251 Cleaner
1 × 600 L -
×
 ADAPTER 24V 15A S-360-24 Switching Power Supply
1 × 3,000 L
ADAPTER 24V 15A S-360-24 Switching Power Supply
1 × 3,000 L -
×
 ADAPTER MERVESAN MTLRS-250-24 FEATURES -OUTPUT POWER 250 W OUTPUT CURRENT 10.4 A
1 × 5,000 L
ADAPTER MERVESAN MTLRS-250-24 FEATURES -OUTPUT POWER 250 W OUTPUT CURRENT 10.4 A
1 × 5,000 L -
×
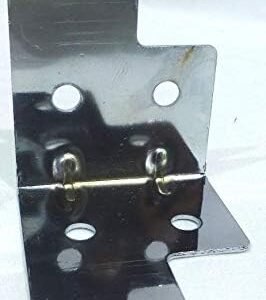 Medium Corner Brace for ATA Flight Case
1 × 200 L
Medium Corner Brace for ATA Flight Case
1 × 200 L -
×
 MT3608 DC-DC Step Up Boost Converter
1 × 300 L
MT3608 DC-DC Step Up Boost Converter
1 × 300 L -
×
 Harduino nano
2 × 1,000 L
Harduino nano
2 × 1,000 L -
×
 All in 1 HDD Docking,2.5''/3.5'' SATA Multi-Function HDD Docking Station SATA Hard Disk Base USB HUB Reader
1 × 3,500 L
All in 1 HDD Docking,2.5''/3.5'' SATA Multi-Function HDD Docking Station SATA Hard Disk Base USB HUB Reader
1 × 3,500 L -
×
 DRG-102 30g
1 × 300 L
DRG-102 30g
1 × 300 L -
×
 heatsink compounds PAST
1 × 200 L
heatsink compounds PAST
1 × 200 L -
×
 JX-9488 Car plate camera
1 × 1,500 L
JX-9488 Car plate camera
1 × 1,500 L -
×
 Proskit TZ-204N
1 × 800 L
Proskit TZ-204N
1 × 800 L -
×
 DHT11 Temperature sensor
1 × 300 L
DHT11 Temperature sensor
1 × 300 L -
×
 Ds Robotics® Bo Motor 3V-6V DC Geared Motor Dual Shaft
1 × 600 L
Ds Robotics® Bo Motor 3V-6V DC Geared Motor Dual Shaft
1 × 600 L -
×
 Solder ball ppd alloy sn63pb37 0.75mm
1 × 200 L
Solder ball ppd alloy sn63pb37 0.75mm
1 × 200 L -
×
 2 Bay M.2 SATA Clone Docking Stations, SSD Duplicator Support One-Key System Disk Copy Function Hard Drive Accessories
1 × 5,500 L
2 Bay M.2 SATA Clone Docking Stations, SSD Duplicator Support One-Key System Disk Copy Function Hard Drive Accessories
1 × 5,500 L -
×
 USB 3.0 Switch Selector KVM
1 × 2,200 L
USB 3.0 Switch Selector KVM
1 × 2,200 L -
×
 5V 4 Channel Relay Module for harduino
1 × 500 L
5V 4 Channel Relay Module for harduino
1 × 500 L -
×
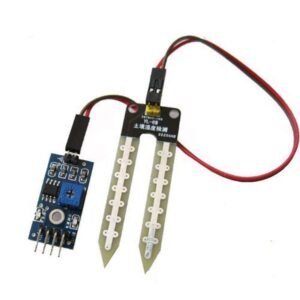 Humidity Sensor Module
1 × 400 L
Humidity Sensor Module
1 × 400 L
Nënshumë: 42,100 L


There are no reviews yet.